Looking for RV maintenance essentials? We all dread it and don’t want to do it, but we also know that it is very important to ensuring the longevity of our RV’s and keeping our families safe.
RV maintenance can certainly seem overwhelming. For this reason, we’ve put together this blog post to address some of the key areas that need to be monitored, give some RV maintenance tips, and included an RV maintenance checklist and schedule that can be used to ensure your RV is in tip-top shape!
Of course, all RV’s are different and while this article outlines what the author thinks is the most important, you should always read your owner’s manual and follow any special steps your manufacturer has outlined.
>> Want to learn more about Fulltime Families Membership? Head here for more details and learn more.! <<
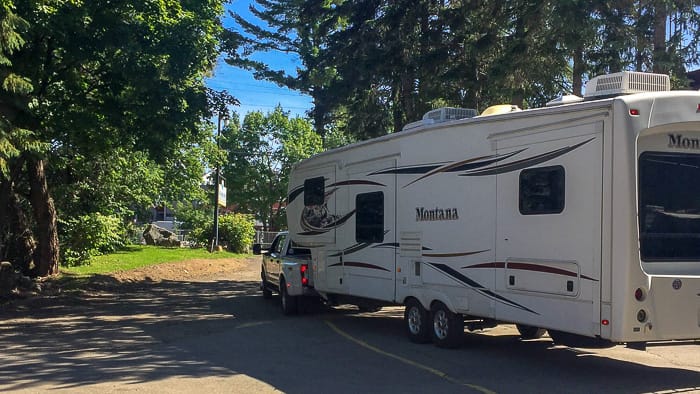
It should also be noted that this blog post is geared towards towables (travel trailer or 5th wheel). However, many of the same RV maintenance tips apply to Class A, B and C’s. From cabin air filter to portable generators, being safe and prepared before long road trips is a must. This is most important on heavier vehicles like Recreational vehicles.
It should also be noted that these maintenance tips are assuming full-time RV living. If you don’t use your RV all the time, it will change the frequency of some of these items.
We’ll start by going over some of the key areas that need to be maintained, along with basic steps that should keep you rolling! It may help to keep in mind that in just about all cases, RV maintenance is about keeping water out, moving parts lubricated, and attached items secured.
This article may contain compensated links, please read our disclaimer for more information.
How to Maintain an RV Roof
There are a few different types of RV roofs available. However, rubber is the most common by far. In terms of RV roof maintenance, we recommend a monthly check on the roof, which just involves getting up there and looking around.
You’ll want to pay special attention to any discoloration, soft spots or areas where it looks like water might pool. As you may already know, water is the enemy and you want to make sure it can’t get in! You’ll also want to keep it clean with a periodic sweeping and cleaning with mild detergent, water, and a stiff brush.
In most cases, you will see puddles of white, self-leveling lap sealant covering all the points where vents, air conditioners, solar panels, etc. are attached to the roof and where water can potentially get in. You’ll want to check these areas carefully during RV roof maintenance for cracks or separation. If you notice any, they are easy to fix!
To do this, you’ll need to clean the area first with a mild detergent or degreaser, let it dry thoroughly, and then apply new lap sealant right over the old. While you can usually apply right over the cleaned lap sealant, if your pool gets to be too large, you can always strip it off carefully with a putty knife and apply a fresh coat of lap sealant.
You can purchase lap sealant at just about every RV store as well as on Amazon and other places online. If you need to build an area up, you can also get a non-leveling lap sealant as well, which will hold its shape better than the self-leveling.
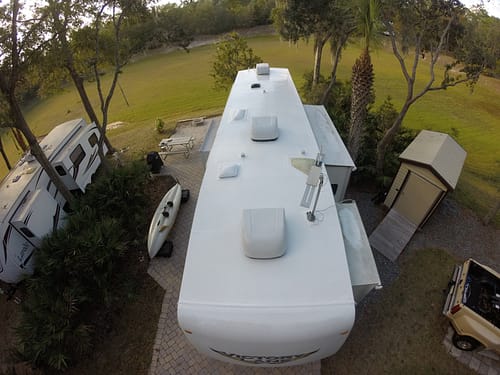
Photo Credit: Jason Simpson
If you come across any tears or holes, Eternabond is a permanent rubber tape that can be applied right over it. Eternabond is very strong, so apply carefully to avoid wrinkles. Once you stick it down, it is VERY hard to get back up! I like to keep an extra roll of Eternabond in my toolbox, as it has proven to be useful in a lot of different, unorthodox places. BUT, that’s probably for another blog post…
The final thing to point out about the roof is to NEVER apply anything with silicone in it to your roof. The issue with silicone is it can’t hold together when the RV is moving and twisting. So, it will separate and allow water to get in. If you accidentally applied silicone, or if a previous owner did, you’ll need to remove all traces of it before a lap sealant will stick. To remove it, I’d recommend a plastic putty knife and mineral spirits or silicone remover.
You can get many years out of a RV roof, but eventually, it may require replacement. There are a few options out there, but RV Armor is highly recommended. They can give you an estimate and come to you to repair or replace.
How to Maintain RV Awnings & Slide Covers
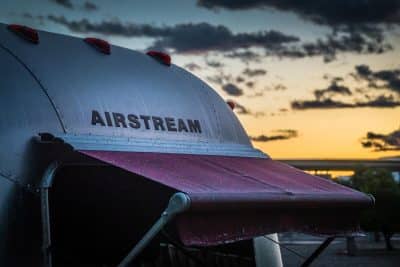
An RV awning is a great way to create some shade and help keep our interiors cool. In addition to your awnings, some RV’s have slide covers that look like awnings and cover the slide from leaves, pine needles, rain, etc.
Wondering about awning maintenance? I’d typically recommend periodic cleaning, using the same soap you wash your RV with, or just some dish detergent in warm water. For the awning, you’ll want to use a softer brush than you would for the walls, or just gentle rubbing with a stiffer one.
Unfortunately, awnings can get mildew or mold fairly easily. If you don’t extend yours often, water just sits in the rolls and can’t get out. Using the awning periodically on sunny, dry days can help ensure it is kept dry. If you do get mildew or mold, you can normally get it off with just some basic scrubbing and if not, there are quite a few products made to help remove them. I’ve had some success with Star Bright Mildew Remover and would recommend giving it a shot if the regular soap and water don’t work. Just make sure that when you are done, you rinse well so it doesn’t stain your awning after a long exposure to it.
As with any moving parts, a lubricant on the awning arms can help keep things moving smoothly. For this type of application, I like to use something like Fluid Film, which is a lanolin based lubricant which also helps to inhibit rust.
RV Water Heater Maintenance Tips
RV water heaters can be propane, electric or a combination of both. The easiest way to tell is to look at the unit. Propane based units will have a copper propane line entering it. If there is also a black on/off switch, that’s probably a good indicator that it has electric as well.
For a unit that has a propane burner, it’s a good idea to periodically clean out the burn chamber with a small vacuum to remove any built up rust or dirt. You’ll also want to observe the flame when ignited, to ensure the flame is a solid blue. If you see an orange flame, something is wrong and it will need to be checked out.
Your water heater will accumulate sediment in the bottom of it, which can really impact its ability to heat properly. About once a year, it’s a good idea to drain and flush the tank to get it all out. You can use a small piece of hose, or purchase a water heater tank rinser to get it all out. While you are doing that, it’s a good idea to put a new anode rod in, if you water heater has one. The anode rod is a “sacrificial” piece of metal that corrodes due to electrolysis, so the exposed steel in your tank doesn’t corrode itself. Anode rods are used in most Suburban propane heaters, but not in Atwoods.
Trailer Slide-Out Maintenance
Maintenance for your slides is pretty simple. On a fairly regular basis, I’d recommend a dri-lube, like this one, which is made for lubricating your slides. You’ll want to clean the metal parts of your slide, then apply the dry lube to keep it from sticking and screeching. While there are a few different types of slides, lubricating any metal parts that move is the easiest way to ensure you are protecting all the essential parts. In addition, you can also add a conditioner and protectant on the rubber seal going around the sides and top of the slide.
Taking Care of RV Electrical Parts
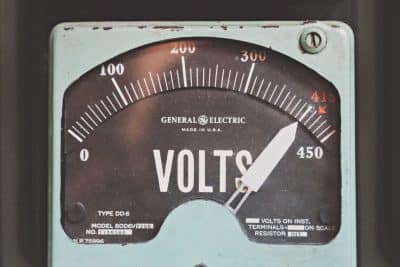
RV’s typically have two forms of electric – 110 volt, for when you are plugged into shore power or have a generator running, and 12 volt when you aren’t. For your 110, there’s not much maintenance required, but you’ll want to regularly inspect your power cord for signs of wear, fraying or melt/burn marks on the receptacles. In addition, you can wipe some protectant and lube on the plugs to help keep them from corroding and make it a bit easier to plug in and unplug.
As for your 12 volt, it depends on your battery types. You’ll want to inspect regularly to ensure you don’t see any swelling or leaking. If you have lead acid, non-sealed batteries, you’ll want to check the water level and top off with distilled water when they get low. Batteries won’t last forever, so eventually they all have to be replaced.
Caring for RV Tires
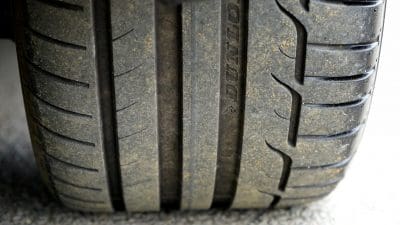
You’ve got a lot riding on your tires, so it’s a good idea to pay special attention to them! You want to make sure you maintain the proper air pressure and you’ll want to inspect both the outside and INSIDE sidewalls, which will require you to crawl under your RV with a flashlight. You’re checking to ensure you don’t see any cuts, cracks or bulges. If you do, it’s time to replace. Don’t forget your spare tires! They’ll require air and maintenance as well.
While traveling, it’s a good idea to keep any eye on your tire temperature. During stops, an infrared temperature gun is a great way to check the sidewall and tread temperature. You can diagnose potential tire issues by ensuring the temperature isn’t too high and that all your tires are in the same temperature range.
In addition, check the tread depth (you can use the same penny trick as used with vehicle tires) and that the tires are wearing evenly. If you see uneven wear, it can be an indicator of a bad tire, bad bearing, your axle being out of alignment or the wheel needing to be balanced.
You’ll also want to know your tire’s age. Since RV’s can spend a lot of time stationary, you want to make sure they don’t get too old. Tires may look great, but if they are 4 years or older, you’ll want to consider replacement to avoid blowouts. Tires will typically have the manufacture date stamped right on the sidewall.
One last tip on your tires: The RV tires that come on new RV’s can be truly awful! It’s not a bad idea to check the brand and do a quick Google search to see reviews. It’s truly unfortunate how many new RV’s have blowouts due to the cheap tires that are included. Blowouts can be scary, cause accidents and tear up the bottom of your RV! While expensive, it may be worthwhile to consider replacing them before they cause a problem for you.
RV Maintenance: Wheels, Bearings, & Brakes
Probably one of the most overlooked sections of an RV is the wheels, bearings and brakes. This is unfortunate because these are some of the most important aspects of travel trailer and 5th wheel RV maintenance. Starting with your wheels, you’ll want to inspect regularly to ensure you have no cracks or stress marks. I also make it a habit to count my lug nuts on moving day, just to make sure they are all there! It’s also a best practice to ensure you use a torque wrench anytime you remove your lug nuts, to make sure they are securely tightened – and then stop every 50 miles or so to re-tighten, until they don’t loosen up at all.
Your wheels are attached to your hub, which encloses your bearings, spindle and brake pads (on most trailer setups – of course if you have disc brakes, your setup will be different). The spindle sticks off your axle and is what your bearings spin on. Those bearings are spinning anytime you are moving and require grease to ensure they don’t overheat and can rotate easily. To keep those bearings greased, you’ll want to re-pack them roughly every 10,000 miles or yearly (whichever comes first.)
A lot of RV’s come with “EZ-Lube” hubs – which means you’ll find a zerk fitting at the end of the spindle, where you can attach a grease gun. This is a great way to add some extra grease between re-packing and can extend how long you can go before re-packing. While some would argue that using your EZ-Lube hubs, you don’t need to remove your bearings, I would still recommend you periodically remove the bearings to check for grooves or damage. Bearings are cheap to replace and for safety reasons, good to keep an eye on.
While you have your hub off to re-pack your bearings, it’ll give you a good opportunity to inspect your brake pads. They should be wearing evenly and can be replaced while you have everything apart. A quick search on the internet will show you that it’s much easier (and cheaper) to buy the whole brake assembly, instead of trying to replace just the pads.
As with your tires, it’s a good idea to keep an eye of the temperature of your bearings and brakes while traveling. Using that infrared temperature gun, you’ll be able identify potentially dangerous situations if your brakes or bearings get super hot.
Maintaining your bearings and brake pads may sound intimidating, but it really isn’t. Watch a few YouTube videos and you’ll be re-packing your own bearings and replacing your brake pad assemblies in no time! Also, ask around. You probably know someone that already knows how to do it and would be happy to show you.
Hitch & Kingpin Maintenance
Whether you have a 5th Wheel or a travel trailer, you’ll want to inspect both the RV and truck connection points regularly to ensure nothing is loose, cracked or damaged. A little electrical protectant and lube on the electrical connection will help inhibit rust and ensure your trailer lights and electric brakes work as they should.
For your 5th wheel hitch, you’ll typically find a zerk fitting to lubricate the locking mechanism. I’d recommend a few pumps of grease every few times you hook up. In addition, a teflon plate on the kingpin helps to provide some protection from scratching and rust.
For a travel trailer, a little grease on the ball will help the trailer slide on and off and rotate correctly.
Camper Maintenance: The Water System
Your water system maintenance should be fairly straight forward, but is still an important part of camper maintenance. I’d recommend sanitizing the whole system every 6 months if you are using it full-time, but if not, it’s probably a good idea to sanitize it after it sits for more than a month with no use. Sanitizing is as simple as putting some bleach into the system, ensuring it gets into all the lines, letting it sit and then rinsing until you can’t smell any bleach.
In addition to sanitizing the internal lines, replacing your external water hose once a year or so is also recommended.
Black and Gray Water Tanks Upkeep
The best maintenance for your black tank is to ensure you use plenty of water during regular use, keep your black tank closed except to dump when at least 3/4 full, and flush the tank often. If your RV didn’t come with a built-in flush system, you can either purchase a RV tank wand or just fill up your tank with clean water a few times and dump.
As a personal tip, I’d recommend adding a gate valve to the end of the system – this way you’ll never be surprised when you take off the cap!
Join Fulltime Families
Fulltime Families Members get access to the best resources, community and discounts.
Summary
We hope you’ve found these camper maintenance tips to be helpful! In just about all cases, a quick Google search will give you more details on any of the maintenance items described above.
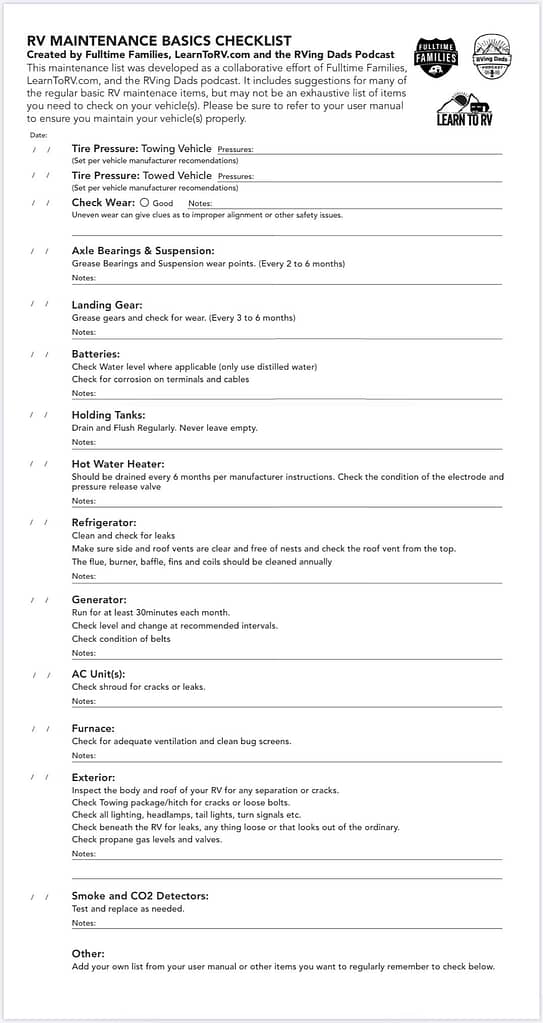
We’ve also included a basic travel trailer and 5th wheel maintenance checklist and schedule below. Just remember, every rig is different and you may need to tweak these recommendations based on yours!
If you haven’t heard about Fulltime Families, click here to read more about the benefits of our membership and the support you receive from our private Facebook groups regarding RV maintenance and so much more!
Fulltime Families is a participant in the Amazon Services LLC Associates Program, an affiliate advertising program designed to provide a means for sites to earn advertising fees by advertising and linking to amazon.com, amazon.co.uk, amazon.ca. Amazon and the Amazon logo are trademarks of Amazon.com, Inc. or its affiliates.
About the Author
Todd Muller, who is originally from upstate New York, has been traveling in a fifth wheel with his wife, 3 children and dog since early 2016. He is half of the RVing Dads Podcast team. Give them a listen at rvingdads.com.
