This article may contain compensated links, please read our disclaimer for more information.
Jumping into RVing for the first time can be overwhelming. There’s just so much to learn. And one of the very first things you’ll need to figure out? How to use RV hookups.
The good news is that using RV hookups is actually pretty straightforward, and after a couple of times of hooking your RV up to water and electricity, you won’t have to think much about it anymore. Here are the basics to get you started.
Using RV Electric Hookups
Let’s start with the electric hookup. This particular hookup is what powers your RV’s appliances. Unless you have a big battery bank, an inverter, and some way to keep your batteries charged, you will need to have an electric hookup in order to use things like the air conditioner, TV, and power outlets in your RV.
Luckily, plugging into an RV electric hookup is a cinch.
What You Need
In order to connect to an RV electric hookup, you will need an RV surge protector. There are both 30-amp and 50-amp options available, so make sure you know which one your RV requires so you can purchase the correct surge protector for your setup.
You may also want to invest in a dog bone adapter, which will allow you to plug your 30-amp RV into a 50-amp outlet or vice versa. Some people also like to keep an RV extension cord on hand in case the power pedestal happens to be set far away from the RV pad.
Connecting to Electric RV Hookups
To connect to an RV electric hookup, first locate the correct outlet. A 30-amp outlet will have spots for three prongs, while a 50-amp outlet will have spots for four prongs. You want the outlet that matches the plug on your RV. If only one outlet type is available, you might need to use a dog bone adapter to plug your RV in, in which case you’ll need to plug the adapter in first.
Plug your surge protector into the correct outlet (or into the adapter if applicable), turn the breaker switch to the ‘on’ position, and look at the display on the surge protector. If everything on the display seems to be in order, turn the breaker off again, plug the RV into the surge protector, and flip the breaker back on. Doing so should send power to the entire RV.

Using RV Water Hookups
Next in the lineup is the RV water hookup. Connecting your RV to a water hookup will send water to the sinks, shower, and toilet in the rig. Using RV hookups to obtain water removes the need to fill the fresh tank and use your RV water pump, as pressurized water will move directly from the spigot into the water system.
What You Need
Connecting to a campground water spigot requires that you have an RV water pressure regulator. This ensures the flow of the water coming in is not too much for your system to handle. Too much water pressure could cause damage to the water lines or connection points, which in turn would lead to leaks—and those are your worst enemy, so never forget to use the regulator.
You will also need a freshwater hose. Make sure you get a blue or white freshwater hose rather than a green or black garden hose. This is important, as freshwater hoses provide water that is safe to drink.
Lastly, you might also want to buy an extra freshwater hose for those times when the spigot is far away from the RV. Some people also like to invest in in-line water filters that help clean the water before it enters the RV water system.
Connecting to Water RV Hookups
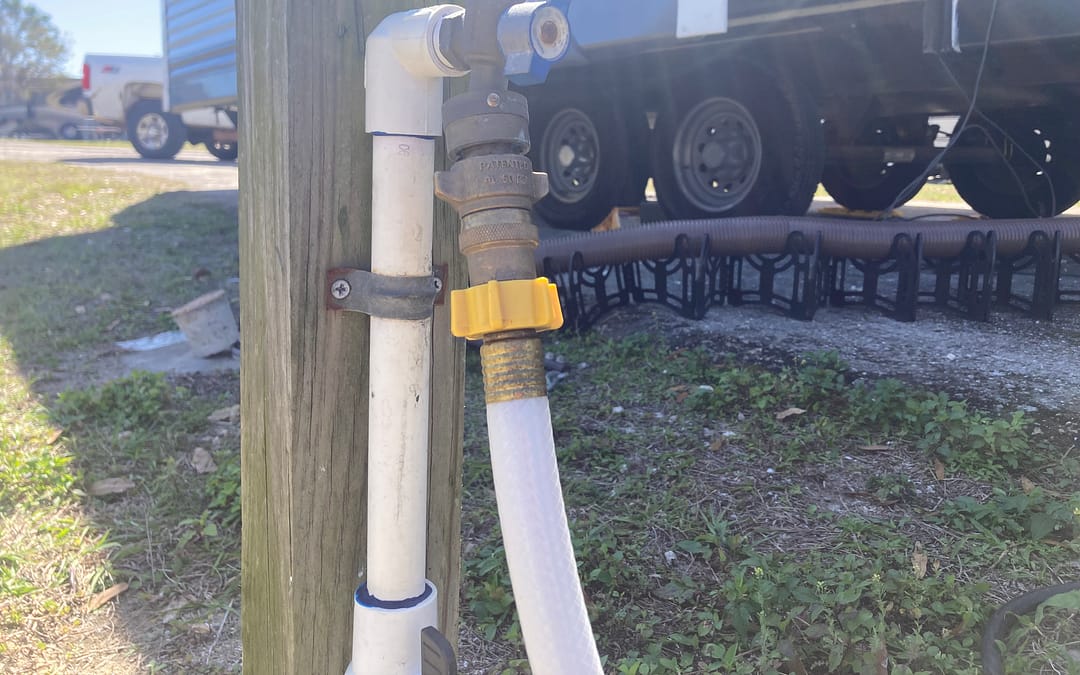
Before you connect to a campground water hookup, twist your water pressure regulator onto the end of your freshwater hose. Next, twist the other side of the water pressure regulator onto the threads of the water spigot. Some people choose to run some water through the hose at this point to get rid of any debris that may be hiding inside of the water hose, and to ensure the outgoing pressure looks correct.
Once that is all in place, find the other end of your freshwater hose. If you will be using an in-line water filter, it can be twisted onto this end of the hose. Otherwise, connect this end of the hose to the city water inlet on the side of your RV, making sure it is twisted snugly into place.
Turn the water on and watch for leaks at the connection points, tightening as necessary. Once all connections are snug, head inside and test the water pressure at a sink. You will likely have to let it run for a bit to get air pockets out of the line so the water can flow smoothly. If needed, go back outside and adjust the water pressure until it is just right.
Using RV Sewer Hookups
Lastly, there are the RV sewer hookups to contend with. Connecting to a sewer hookup allows you to empty your wastewater tanks into the city sewer system or a septic tank. Having a sewer hookup at your site is nice because it means you don’t have to break camp in order to head to a dump station every time your tanks fill up.
What You Need
In order to use a sewer hookup, you will need an RV sewer hose with all the connections and fittings. This kit includes everything you need. We also recommend disposable gloves, an RV sewer hose support, and an extra length of sewer hose. A tool to back-flush the tanks can be quite useful as well.
Connecting to Sewer RV Hookups
To connect your RV to a sewer hookup, put on some disposable gloves. Start by removing the cover from the dump point in the ground. Screw the threaded connector piece included in your sewer hose kit into the pipe, making sure it is tight. Connect the elbow to the threaded piece by twisting it into place and twist the actual hose onto the elbow piece, making sure the bayonet fittings pop into place.
Remove the cap from the wastewater dump pipe on your RV and use the bayonet fittings to connect the other end of the sewer hose to the dump pipe. Place your RV sewer hose support under the hose to help create a ramp down to the dump point in the ground.
Pull the handle for the black tank first—leaving the gray side closed!—and allow all wastewater to run out. Close the black tank and then open the gray tank, allowing it to drain. If desired, connect the back-flush tool and flush out both tanks, or use the toilet to fill the black tank with freshwater and dump it again to help rinse it out. Keep the black tank closed until you’re ready to dump again. The gray tank can stay open or remain closed.
Finding Campgrounds with Hookups
It’s important to know that not all RV campgrounds have all kinds of RV hookups. Some have full hookups, while others offer only water and electricity. There are dry campgrounds with no hookups whatsoever, campgrounds that offer electricity at each site but then have only a communal potable water refill spot and dump station, and there are even campgrounds that have only a water spigot at each site and nothing else.
Obviously, you will want to know what you are getting before you book. Some important questions related to RV hookups that you will want to answer before choosing a campground include…
- Are there electric hookups at each site?
- If so, are the outlets 30-amp, 50-amp, or both?
- If not, do you have solar power or a generator to provide your family with power? (Related question: What are generator hours?)
- Are water hookups available at each site?
- If not, is potable water available in the campground for filling fresh tanks?
- Are sewer hookups available at each site?
- If not, is there a dump station in the park?
- If water and/or sewer RV hookups aren’t available at each site, is there a bathhouse available to help reduce water usage in your rig?
- How far are the hookups from the RV pads? Will you need extensions of any kind?
Finding out these things in advance will ensure you head to each new campground prepared to handle the setup and takedown of the RV hookups in that park.
Ready to put your knowledge on RV hookups to the test? Why not book your first trip out now? You might still need to learn a thing or two, but you’ll never know if you don’t try!
Join Fulltime Families
Fulltime Families Members get access to the best resources, community and discounts.
Fulltime Families is a participant in the Amazon Services LLC Associates Program, an affiliate advertising program designed to provide a means for sites to earn advertising fees by advertising and linking to amazon.com, amazon.co.uk, amazon.ca. Amazon and the Amazon logo are trademarks of Amazon.com, Inc. or its affiliates.