
This article may contain compensated links, please read our disclaimer for more information.
One of the most important things you can do as an RV owner is make sure you keep up with RV maintenance. And one of the most important RV maintenance tasks? Sealing an RV roof and seams. Yes, you will definitely want to make sure you stay on top of resealing your RV.
Here’s everything you need to know about RV sealing.
The Importance of RV Sealing
Before we dive in too deep, let’s talk a little about why resealing your RV is such an important maintenance task. First, you need to know that water is an RV’s worst enemy. A water leak can lead to all kinds of horrible RV problems, including delamination, mold, dry rot, and eventually, frame failure.
Obviously, you don’t want water to get into the roof, walls, and/or floor of your RV. How do you ensure you keep the water out? Well, this is where RV sealant comes into play. Sealing an RV in every spot that water could potentially get in will ensure your rig stays nice and dry so you can continue using it for years to come.

RV Roof Sealant: Types and Uses
Of course, you will want to ensure you have the right tools for the job of sealing an RV. In this case, this means learning a bit about various RV roof sealants and which one(s) you need to complete the task at hand.
Self Leveling RV Roof Sealant
Self leveling RV roof sealant can be used for most RV roof jobs. When applied to a flat surface, this sealant levels itself out, ensuring smooth, even coverage. Some jobs that RV self-leveling caulk can be used for include sealing the seams around skylights, vents, and other rooftop accessories.
When it comes to RV sealant brands, we especially like the Dicor self-leveling lap sealant. Just be sure you know your roof type and grab a tube of self leveling sealant that is compatible with your roof.
Non-Sag RV Sealant
If you’ll be doing a job that requires the sealant to stay in place rather than drip and settle, you’ll need to look at non-sag RV sealant. This is best for vertical surfaces, as it will stay in one place. It can be smoothed out with a wet finger if need be.
Not sure which non-sag sealant to use? We recommend Dicor non-sag sealant. Again, you will want to make sure it is compatible with your RV roof type.
RV Sealant Tape
Some people really like to keep some RV sealant tape on hand for sealing an RV quick fixes when caulk-style RV sealant isn’t available or doesn’t make sense. This is best used for patching small holes or rips in a rubber roof, but some people use it to seal around skylights and vents.
We especially like Eternabond roof tape for this purpose. Just make sure you clean the area and follow all instructions for application, and keep in mind that this tape is very difficult to remove once applied, potentially making future repairs more difficult.
RV Roof Patch Kit
Finally, there is the RV roof patch kit. Honestly, the RV sealant tape mentioned above could probably patch pretty much anything a patch kit could. That said, some people prefer the patch kits because they leave you with a cleaner look.
Our favorite RV roof patch kit is made by Camco and does a good job of sealing things back up.
What Not to Use
The products above are all great for resealing an RV. That said, there are many products out there that are not good for RV use. Make sure to avoid the following products, as well as any others that aren’t made specifically for RV roofs:
- Silicone sealants — Silicone won’t bond with other sealants and isn’t likely to stay in place during travel.
- FlexSeal — Some people claim to use FlexSeal for RV roof jobs. This is a terrible idea and will ruin your roof.
- Products that aren’t compatible with your roof type — You will only want to buy products that are made for the type of RV roof you have. Any other product could cause damage.
TPO vs EPDM: What Kind of RV Roof Material Do You Have?
Not sure how to determine what kind of RV roof you have? You are not alone.
There are four main types of RV roofing material:
- EPDM Rubber
- TPO Rubber
- Fiberglass
- Aluminum
You will be able to determine if you have an aluminum or fiberglass roof simply by climbing a ladder and taking a look. However, the vast majority of RVs come with rubber roofs, and figuring out whether yours is TPO or EPDM can be tricky.
This video should help you determine which type of rubber your RV roof is made from:
Walkable vs Non-Walkable RV Roof
Obviously, you will need to break out the ladder to reseal your RV roof. That said, before you step off the ladder and climb onto the roof, you will want to determine if you have a walkable roof. You see, some RV roofs are made to be walked on, but others really aren’t, and those latter ones likely won’t support your weight, leading to major damage.
The only surefire way to determine whether you have a walkable RV roof is to call the manufacturer and ask. That said, if your RV has a ladder attached, there’s a pretty good chance the roof is walkable as long as you’re under 250 lbs or so. Just make sure you stick to the roof joists as much as possible and watch out for rocks stuck in the soles of your shoes that could cause damage.
If you decide that your roof is not strong enough to hold your weight, you can still reseal it. You’ll just have to move the ladder as you work so you can reach whatever you’re working on.
Still can’t reach something that really needs to be sealed? Put a sturdy piece of plywood on the roof and carefully climb up, making sure to spread your body weight as much as possible.

Resealing RV Roof: How To
Now that you know about the various types of RV sealant products and RV roofs, the next step is to learn how to go about resealing the roof. Fortunately, sealing an RV is a pretty straightforward process.
Choose Your Timing Wisely
Choose a day with good weather. You want warmth and sunshine so the sealant will cure properly. Rain can cause issues—not only with drying times, but obviously safety too—so skip this job if there happen to be rain clouds in the sky.
Clean the Area
Start by thoroughly cleaning the areas you wish to reseal. These should include around any rooftop accessories (skylights, vents, etc) and the edge where the roof meets the RV walls.
We will often do this cleaning with nothing more than a damp washcloth, but really dirty areas might require you to use a gentle cleaning product. Just make sure it’s free of citrus, petroleum distillates, and mineral spirits.
While you’re cleaning, look for any caulking that has started to crumble or come away from the roof and peel it up. The only caulking left should be securely stuck to the roof.
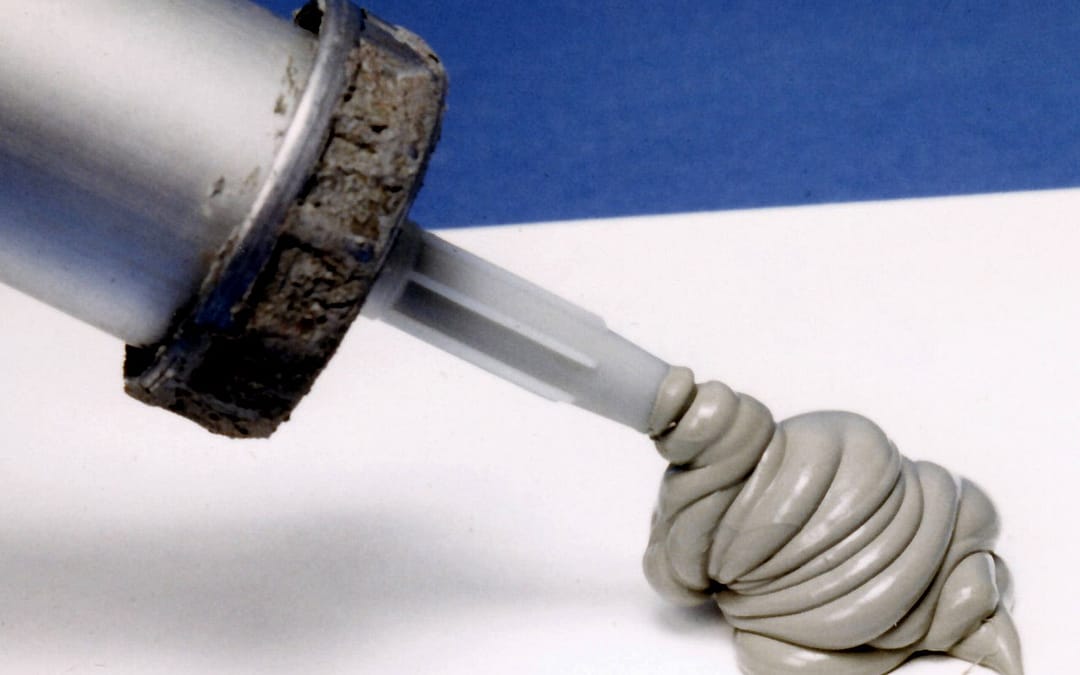
Load Caulking Gun
Load up your caulking gun with the sealant of your choice. Make sure you follow the instructions above, choosing a product that is compatible with your roof type and the job you will be doing.
Cover Well
Cover the areas you wish to seal with the RV sealant. Keep an eye out for trouble spots and make sure they are well-sealed. This new layer of sealant should completely cover any old sealant, and no gaps should be left between the sealant and the surface it is covering.
Patch Holes and Rips
While up on the roof, inspect things thoroughly. If you find any holes or rips in the rubber, make sure to patch them right away using a patch kit or Eternabond tape.
A Word about RV Roof Coating
Sometimes sealing seams alone isn’t enough, and an RV roof needs an RV roof coating to help it last as long as possible. If you have an aluminum or fiberglass roof, this isn’t something you need to worry about, and most TPO roofs don’t really require renovating either. EPDM roofs do benefit from recoating once every 5–10 years though.
This video will help you understand when a roof needs to be recoated and how to go about it:
Sealing an RV: Other Seams that Need Sealing
Resealing your RV roof is super important. That said, it isn’t the only thing on your home-on-wheels that needs sealing. There are plenty of seams along the sides of any rig that need to be sealed up once in a while.
Sealing RV Windows and Storage Bays
Windows and storage bays can leak where they meet the exterior wall of the RV. In some cases, simply running a bead of non-sag RV sealant along the seam is enough to keep water out.
However, sometimes it is necessary to remove a bay door or window to replace the butyl tape. Here’s an example of how to do that:
Sealing RV Corners
The corners of the RV will also need to be resealed from time to time. This can be done with a bead of non-sag sealant, but the end result will look much more professional if you actually remove the corner trim pieces, replace the butyl tape, replace the trim pieces, and then put new vinyl trim insert pieces in place.
Sealing Other Parts and Pieces
There are a number of other parts and pieces on the outside of an RV. These include things like the outdoor shower, outdoor outlets, and the fridge vent. All can be sealed up using non-sag RV sealant, and many can stand to be removed and given a new layer of butyl tape from time to time.
Now that you have a better understanding of why and how to seal a leaking camper roof (as well as the other parts of your RV), get out there and do it! The sooner you seal up those seams, the longer your RV will serve you and your family.
Join Fulltime Families
Fulltime Families Members get access to the best resources, community and discounts.
Fulltime Families is a participant in the Amazon Services LLC Associates Program, an affiliate advertising program designed to provide a means for sites to earn advertising fees by advertising and linking to amazon.com, amazon.co.uk, amazon.ca. Amazon and the Amazon logo are trademarks of Amazon.com, Inc. or its affiliates.